Creating Your First Animated Short: Animation is a magical medium that allows you to bring your imagination to life.
Whether you’re crafting a whimsical story, tackling a thought-provoking theme, or simply exploring your creative potential, making your first animated short can be an incredibly rewarding experience.
However, the process can seem daunting without proper guidance. From developing an idea to sharing your final masterpiece, there are many steps involved, but with determination and organization, you can achieve stunning results.
This comprehensive guide will walk you through each stage of creating your animated short, helping you turn your vision into reality.
Whether you’re a beginner or someone with a bit of experience, these actionable steps will provide clarity and inspiration.
By the end, you’ll have a clear roadmap to start your animation journey.
Step by Step Guide to Your First Animated Short
Step 1: Develop Your Idea
Every great animation begins with a compelling idea. This is the heart of your project and the foundation upon which everything else is built.
But how do you come up with an idea that resonates with your audience?
Finding Inspiration
Inspiration can come from many sources, such as:
- Personal experiences: Stories drawn from real-life events often feel authentic and relatable.
- Books and movies: Borrow themes or character archetypes that intrigue you and put your spin on them.
- Observation: Everyday moments can spark unique ideas. A simple walk in the park or a random conversation could lead to your next big concept.
Key Elements of a Strong Idea
When brainstorming, ensure your idea has these critical components:
- A Clear Message: What is the purpose of your story? Is it to entertain, educate, or inspire?
- Engaging Characters: Your characters should be relatable or intriguing enough to captivate your audience.
- Conflict and Resolution: A story needs tension to keep viewers hooked and a satisfying resolution to leave them fulfilled.
Practical Tips
- Write down every idea, no matter how small or vague. Ideas often evolve into something bigger over time.
- Collaborate with friends or colleagues. Fresh perspectives can lead to unexpected breakthroughs.
- Don’t overcomplicate your concept. Simple ideas are often the most powerful.
By dedicating time to this stage, you’ll create a solid foundation for your project that will guide you through the rest of the process.
Step 2: Write the Script
Once you have a solid idea, it’s time to translate it into a script. Your script acts as the blueprint for your animation, laying out every detail of the story, from dialogue to visual cues.
Why Scripts Are Essential
A script helps:
- Clarify your vision.
- Communicate ideas effectively to your team (if you’re working with others).
- Ensure consistency in storytelling.
How to Write a Great Script
- Start with an Outline Break your story into three acts:
- Act 1 (Setup): Introduce characters, the world, and the main conflict.
- Act 2 (Confrontation): Escalate the conflict and develop your characters.
- Act 3 (Resolution): Conclude the story in a satisfying way.
- Write Dialogue
- Keep it natural and concise.
- Give each character a distinct voice or personality.
- Avoid excessive exposition; show rather than tell.
- Include Visual Descriptions Describe key actions, settings, and emotions to guide the animation process.
Tools and Tips
- Use free scriptwriting tools like Celtx or WriterDuet to format your script professionally.
- Read your script aloud or act it out to identify any awkward pacing or dialogue.
- Seek feedback from peers or mentors to refine your script further.
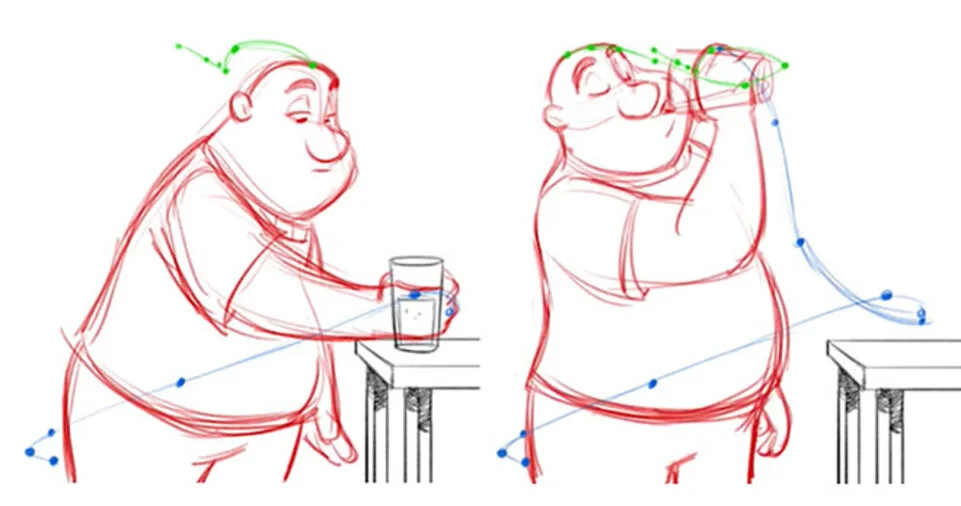
Step 3: Create a Storyboard
The storyboard is the visual representation of your script. It’s where your story starts to come alive as you sketch out the key scenes and sequences.
Why Storyboarding is Important
- Helps visualize the flow of your story.
- Serves as a roadmap for animating scenes.
- Identifies potential issues before production begins.
Steps to Create a Storyboard
- Prepare Your Tools You can use traditional paper and pencil or digital tools like Storyboarder, Photoshop, or Toon Boom Storyboard Pro.
- Sketch Key Frames
- Focus on major actions and transitions.
- Include details like camera angles, character movements, and scene compositions.
- Don’t worry about perfect drawings; clarity is more important than detail.
- Sequence the Shots Arrange your sketches in chronological order to ensure the story flows smoothly. Use arrows or notes to indicate transitions and camera movements.
Pro Tip
Keep your storyboard flexible. You may need to revise it multiple times as you refine your vision.
Step 4: Design Your Characters and World
This is where you give life to your imagination by designing characters and creating the world they inhabit. The more effort you put into this stage, the more immersive your animation will feel.
Character Design
- Focus on Personality: A character’s design should reflect their traits. For instance, a mischievous character might have sharp features and exaggerated expressions.
- Experiment with Silhouettes: Unique silhouettes make characters instantly recognizable.
- Use Reference Materials: Study real-life people, animals, or existing designs for inspiration.
World-Building
- Establish Rules: Define the physical and cultural rules of your world. Is gravity the same? What’s the technology level?
- Create Depth: Even if certain details don’t make it into the final animation, a well-thought-out world adds richness to your story.
- Use Color Schemes: Colors can evoke emotions and set the tone for your animation. Experiment with palettes that complement your theme.
Tools for Design
- Procreate, Clip Studio Paint, and Adobe Illustrator are excellent for character and world design.
Step 5: Choose Animation Software
The software you select plays a crucial role in determining the quality and style of your animated short.
Choose a program based on your skill level, budget, and project requirements.
Popular Animation Tools
- 2D Animation: Toon Boom Harmony, Adobe Animate, Pencil2D.
- 3D Animation: Blender, Maya, Cinema 4D.
- Motion Graphics: Adobe After Effects, HitFilm Express.
Free vs. Paid Software
- Free Tools: Blender and Krita are powerful free options.
- Paid Tools: Adobe Animate and Toon Boom offer advanced features but come with a subscription fee.
Pro Tip
Take advantage of free trials to explore software and find what works best for you.
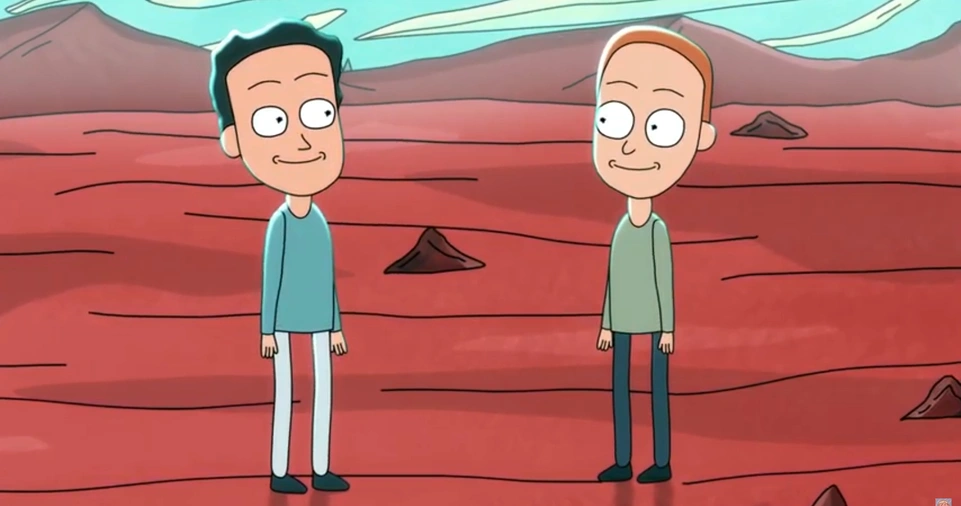
Step 6: Animate Your Scenes
This stage involves bringing your story, characters, and world to life.
Animation is a time-intensive process, but it’s also where the magic happens.
Types of Animation
- Frame-by-Frame: Draw each frame individually for a classic, hand-drawn look.
- Cut-Out Animation: Use pre-drawn elements and manipulate them for faster production.
- 3D Animation: Create models and rig them for dynamic, realistic movements.
Tips for Effective Animation
- Use the 12 principles of animation (e.g., squash and stretch, timing, and anticipation) to make movements feel natural.
- Block out rough animations first, focusing on key poses and timing.
- Refine details once the rough animation flows smoothly.
Tools and Techniques
- Use onion-skinning to align frames and maintain consistency.
- Work in layers for complex scenes, separating characters, backgrounds, and effects.
- Save your work frequently to avoid losing progress.
Step 7: Add Sound and Music
Sound design enhances the emotional depth of your animation and helps immerse viewers in your world.
Elements of Sound Design
- Dialogue: Record character voices using a good-quality microphone.
- Sound Effects: Add realistic or stylized effects to enhance actions and settings.
- Background Music: Choose music that complements the tone and pacing of your story.
Tips for High-Quality Audio
- Use royalty-free sound libraries like Freesound or Epidemic Sound.
- Adjust volume levels to ensure dialogue, effects, and music don’t overpower each other.
- Sync sounds precisely with on-screen actions for a polished result.
Step 8: Edit and Finalize
The editing phase is where you polish your animation and prepare it for distribution.
Steps to Edit Your Animation
- Review Your Work Watch your animation multiple times to identify errors or inconsistencies.
- Add Transitions Use fades, cuts, and other transitions to enhance storytelling.
- Export in the Right Format Choose a format like MP4 or MOV for compatibility and high quality.
Pro Tip
Create a teaser or trailer to generate excitement before releasing your full short.
Step 9: Share Your Work
Once your animated short is complete, it’s time to share it with the world!
Platforms to Share Your Animation
- YouTube and Vimeo: Great for reaching a global audience.
- Social Media: Share clips or behind-the-scenes content on Instagram, TikTok, and Twitter.
- Film Festivals: Submit to animation festivals like Annecy or Ottawa for recognition.
Promotional Tips
- Create eye-catching thumbnails and descriptions.
- Engage with viewers by responding to comments and sharing your creative process.
- Collaborate with other creators to expand your reach.
ALSO READ:
Conclusion
Creating your first animated short is a challenging yet rewarding experience that combines creativity, technical skill, and storytelling.
By following these detailed steps—from developing a compelling idea to sharing your finished work—you’ll be well-equipped to bring your vision to life.
Remember, the process requires patience and persistence, but the result is worth every effort.
Embrace the journey, learn from your mistakes, and most importantly, have fun bringing your story to the screen.